

Mastering AWS VPC: The Ultimate Guide to Building a Secure and Scalable Network Infrastructure


Starting with an example; Suppose you are living in your house and it consisted of 5 rooms. Of that 5 rooms, one is your personal room which nobody interferes with, no one has access to that room other than you i.e. you are the owner of that room you will manage everything happening in that room.
Same is the case with Virtual Private Cloud(VPC) in the cloud; in our case AWS. From the whole cloud, you are allocated a dedicated space in which you can do any activity and no one other users can interfere.
OR we can say Virtual Private Cloud (VPC) is a logically isolated network from another virtual network in the AWS cloud where you can launch the AWS resources.
SOME IMPORTANT POINTS ABOUT AWS VPC:
A maximum of 5 VPCs can be created per region in one VPC, with each VPC allowing up to 200 subnets.
Each AWS account can allocate up to 5 Elastic IPs.
(Elastic IP - If we assign the Elastic IP to any instance it will not change if the instance is stopped otherwise if the instance is stopped and resumed the public IPv4 IP will change).
When a VPC is created, DHCP, NACL, and security groups are automatically created.
A VPC is region-specific and cannot extend between regions, while subnets are availability zone-specific.
The CIDR block range of a VPC cannot be changed once it is created, but additional IP address ranges can be added.
When you create a VPC you must specify an IPv4 CIDR block for VPC. The allowed block size is in b/w /16 to /28 sub netmask.
The first four and last IP address of the subnet can’t be assigned.
Eg. 10.0.0.0 is the network address
10.0.0.1 – reserved by AWS for VPC Router
10.0.0.2 – reserved by AWS. The IP address of the DNS server
10.0.0.3 – reserved for future use
10.0.0.255 – broadcast address
NOTE: AWS does not support broadcast in a VPC but reserves the address
- A VPC peering connection is a networking connection between two VPCs that enables you to route traffic between them privately. Instances in either VPC can communicate with each other as if they are within the same network. You can create a VPC peering connection between your own VPCs, with a VPC in another AWS account, or with a VPC in a different AWS Region.

TYPES OF VIRTUAL PRIVATE CLOUD:
Default VPC: This is created by default when an AWS account is created and has a network gateway by default.
Custom VPC: The user creating a custom VPC has control over the CIDR and can create their own security groups, Network Access Control Lists, and routing tables. By default, the VPC does not have an internet gateway, but the user can create one if needed.
TYPES OF SUBNETS IN VPC:
Public Subnet is a subnet whose traffic is routed to an internet gateway.
Private Subnet is a subnet whose traffic is not routed to an internet gateway.
Internet Gateway - An internet gateway is a virtual router that connects a Virtual Private Cloud (VPC) to the internet. The internet gateway performs Network Address Translation (NAT) between private and public IPv4 addresses. It supports both IPv4 and IPv6 addresses.
NAT Gateways:
A NAT gateway enables instances in a private subnet to access the internet and other AWS services by giving them a public IP address, but it also prevents incoming connections from the internet to those instances. In other words, the NAT gateway acts as a mediator for outbound connections initiated from the private VPC, but it does not allow incoming connections from the internet.
After you created a NAT gateway you must update the route table associated with one or more of your private subnets to point to the internet-bound traffic to the NAT gateway. This enables instances in your private subnet to communicate with the internet.
CONTROLLING INBOUND AND OUTBOUND TRAFFIC IN VPC:
Security groups and Network Access Control Lists (NACLs) are two mechanisms for controlling inbound and outbound traffic in AWS.
Security groups act as virtual firewalls for instances, allowing you to control inbound and outbound traffic based on rules that you define. You can create security groups and apply them to instances or network interfaces within a VPC. Security groups operate at the instance level, meaning that they apply to all the instances associated with the group. They can control traffic based on IP protocol, port numbers, and source or destination IP addresses.
NACLs are another layer of network security that operate at the subnet level. They are stateless and act as a set of rules for inbound and outbound traffic. NACLs are designed to provide network traffic control at a more granular level than security groups. They are associated with subnets and rules are evaluated in order. NACLs can be used to allow or deny traffic based on IP protocol, port range, and source or destination IP address.
IMPLIED ROUTER & ROUTE TABLES :
The central routing function in AWS connects different availability zones and the VPC to the internet gateway. Each VPC can have up to 200 route tables, with a maximum of 50 route entries per table.
Each subnet can only be associated with one route table at a time, and if no association is specified, the default VPC route table is used.
The main route table cannot be deleted by default but can be edited, and custom route tables can be manually made the main table, allowing the former main table to be deleted.
VPC ENDPOINTS:
A VPC endpoint is a service provided by AWS that allows users to connect their VPC to supported AWS services privately, without requiring a public IP address, access over the internet, NAT device, VPN connection, or AWS Direct Connect. VPC endpoints are virtual devices that are horizontally scaled, redundant, and highly available components that allow communication between instances within the VPC.
Access to resources in other services can be controlled by endpoint policies, which are written in JSON format. By default, the endpoint policy allows full access to the service, but users can create their own policies to restrict access to specific resources or actions within the service. However, it's important to note that endpoint policies do not override or replace IAM user policies or service-specific policies, such as S3 bucket policies.
VPC endpoints offer several benefits, including increased security by keeping traffic within the VPC, lower latency, increased throughput by avoiding internet traffic, and reduced costs by eliminating the need for NAT devices or VPN connections. They can also simplify network architecture and reduce the complexity of managing security groups and network access control lists.
Overall, VPC endpoints are a useful tool for AWS users who want to securely and efficiently connect their VPC to supported AWS services.
TIME FOR HANDS-ON:
Log in to the AWS Console: Navigate to the AWS Management Console and sign in using your AWS credentials.
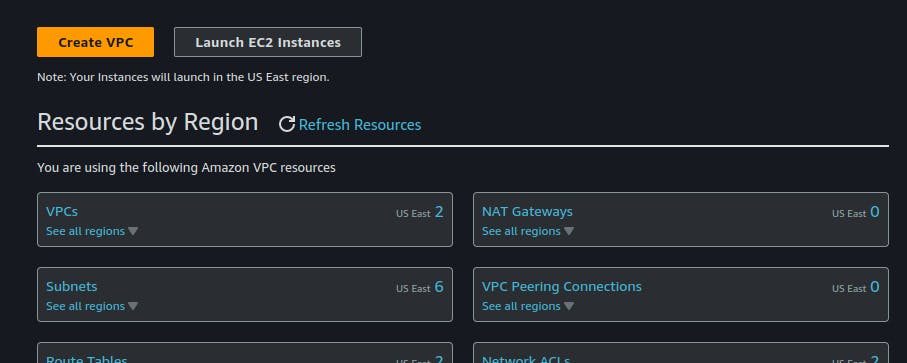
Navigate to the VPC Dashboard: Once you are logged in, navigate to the VPC Dashboard by clicking on the "Services" dropdown menu, selecting "VPC", and then selecting "Your VPCs".
Create a VPC: In the VPC Dashboard, click on the "Create VPC" button to start creating a new VPC.
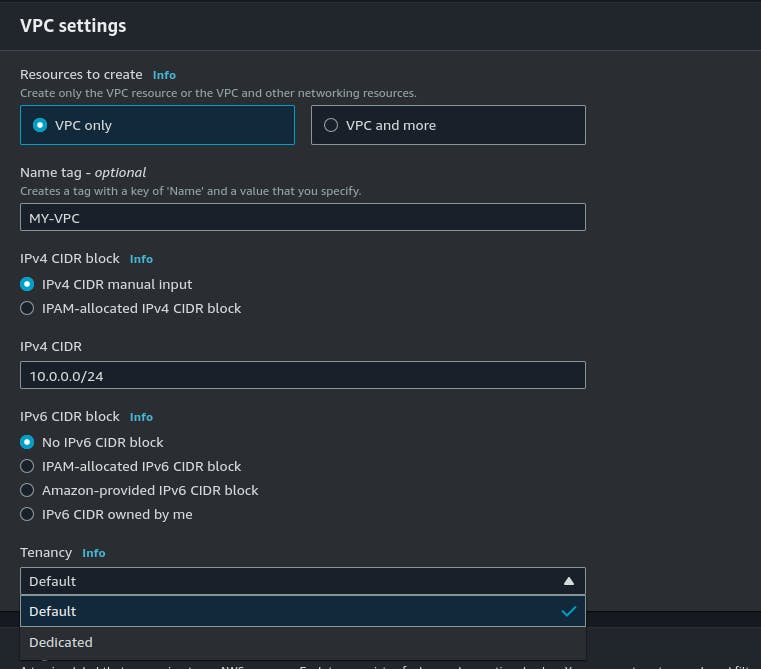
Configure VPC Settings: In the "Create VPC" wizard, you will be asked to provide the following information:
Name tag: A name for your VPC (e.g. "MyVPC").
IPv4 CIDR block: A CIDR block for the VPC's IPv4 address range (e.g. "10.0.0.0/16"). This range must not overlap with any other CIDR blocks in use in your AWS account.
IPv6 CIDR block: An optional CIDR block for the VPC's IPv6 address range.
Tenancy: You can choose between "default" and "dedicated" tenancy. Choose "default" unless you have specific requirements for dedicated tenancy.
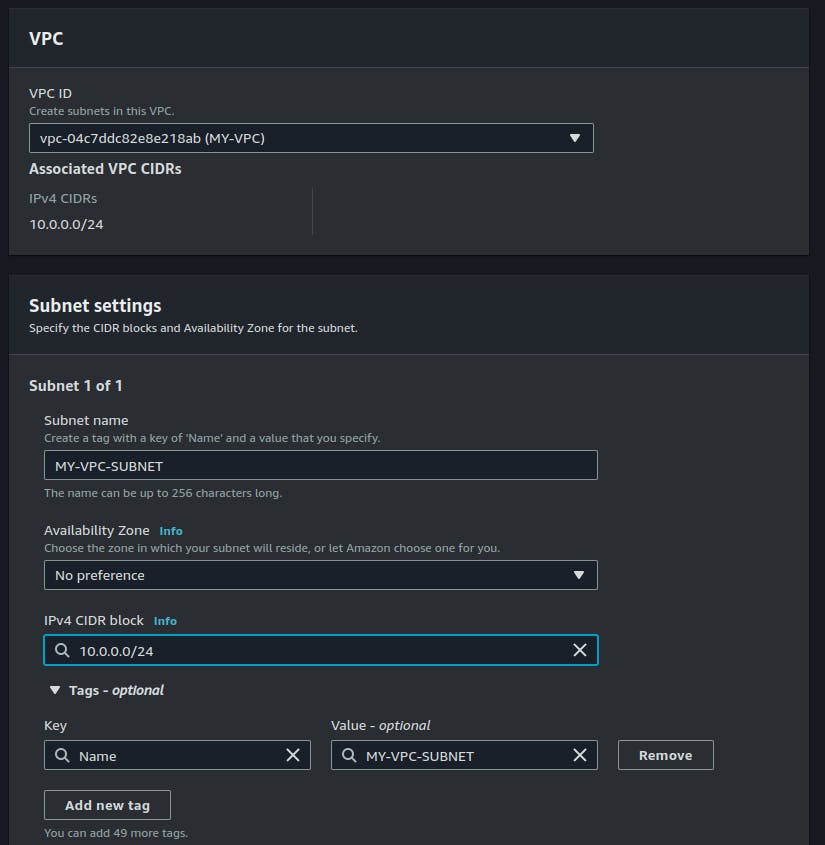
- Create Subnets: After creating the VPC, you will be prompted to create one or more subnets. To create a subnet, provide the following information:
Name tag: A name for your subnet (e.g. "MySubnet").
VPC: Select the VPC you just created.
Availability Zone: Select the availability zone where you want your subnet to be located.
IPv4 CIDR block: A CIDR block for the subnet's IPv4 address range (e.g. "10.0.1.0/24"). This range must be a subset of the VPC's IPv4 CIDR block.
IPv6 CIDR block: An optional CIDR block for the subnet's IPv6 address range.
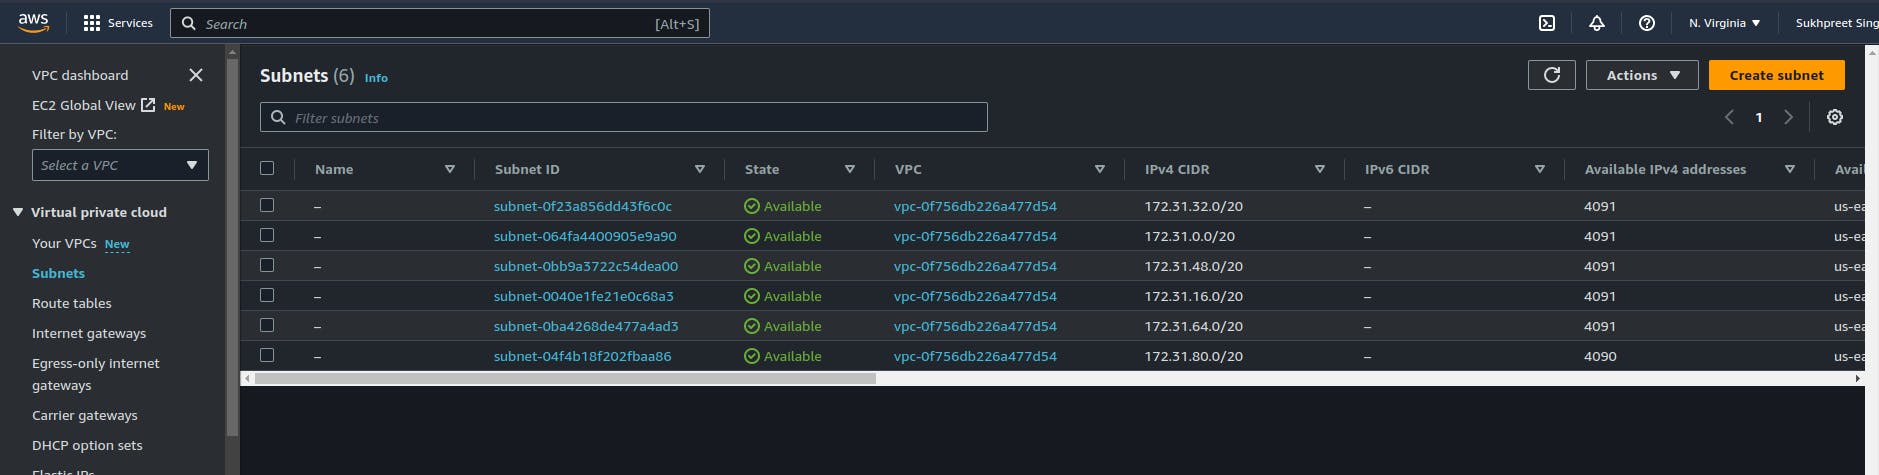
(you can create a new subnet or choose an existing one)
- Create Route Tables: Once you have created your subnets, you will need to create one or more route tables. To create a route table, provide the following information:
Name tag: A name for your route table (e.g. "MyRouteTable").
VPC: Select the VPC you just created.

Associate Subnets with Route Tables: After creating the route table, you will need to associate your subnets with it. To do this, select the route table and then click on the "Subnet Associations" tab. Click on the "Edit" button, select the subnets you want to associate with the route table, and then click on the "Save" button.
Create Internet Gateway: To allow your VPC to communicate with the internet, you will need to create an Internet Gateway. To create an Internet Gateway, provide the following information:
Name tag: A name for your Internet Gateway (e.g. "MyInternetGateway").

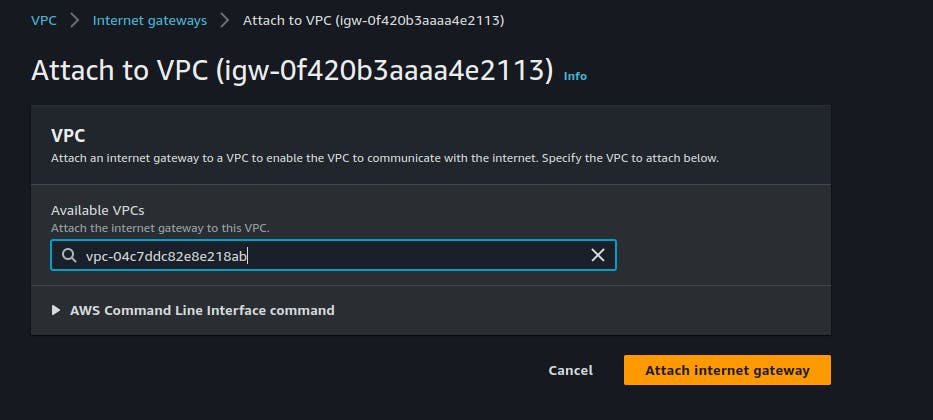
Attach Internet Gateway to VPC: After creating the Internet Gateway, you will need to attach it to your VPC. To do this, select the Internet Gateway and then click on the "Actions" dropdown menu. Select "Attach to VPC", select the VPC you just created, and then click on the "Attach" button.
Create Route to Internet Gateway: After attaching the Internet Gateway to your VPC, you will need to create a route to it. To do this, select the route table you just created and then click on the "Routes"
You can also play around on your own and get more knowledge about it.
THANKYOU! HOPE YOU LIKED IT! ANY SUGGESTIONS ARE WELCOMED...